
TL;DR
What Is Screen Recording?
Screen recording is the process of capturing everything that happens on your computer or device screen as a video file. Think of it like pointing a camera at your monitor, except the capture happens digitally with perfect clarity.
The result is a video you can share, edit, or archive. Most modern screen recorders also capture system audio, microphone input, and even your webcam feed as an overlay, so your recordings can include narration and a face-to-face element.
You'll sometimes see screen recording called "screencasting" or "screen capture." These terms are interchangeable for most purposes. Screen capture can also refer to taking a static screenshot, but in this guide we're focused on video.
Why Screen Recording Matters
Screen recording has moved from a niche power-user trick to an everyday communication tool. According to Wyzowl's 2026 report, 19% of video marketers say screen recording is the type of video they mostly create, making it one of the most popular video formats. Here's why it's taken off.
- 1
It Replaces Meetings
A five-minute screen recording can replace a 30-minute meeting. You record it once, and the recipient watches it on their schedule. No calendar juggling, no "can everyone see my screen?" moments, no wasted time. This is the core idea behind async video communication, and it's transforming how remote teams work.
- 2
It Eliminates Confusion
Text instructions leave room for interpretation. A screen recording shows exactly what to click, where to look, and what the result should be. Support teams use screen recordings to resolve tickets faster. Product managers use them to file crystal-clear bug reports. Trainers use them to onboard new hires without repeating themselves.
- 3
It Scales Your Knowledge
When you record a process once, anyone on your team can watch it anytime. That's why screen recording is becoming the foundation of internal knowledge bases. Instead of explaining the same workflow to every new hire, you record it once and link to it from your docs.
How to Record Your Screen on Mac
macOS has built-in screen recording, but the native tools come with significant limitations. Here's a quick overview of your options. For the full walkthrough with screenshots and troubleshooting, read our dedicated guide on how to record your screen on Mac.
- 1
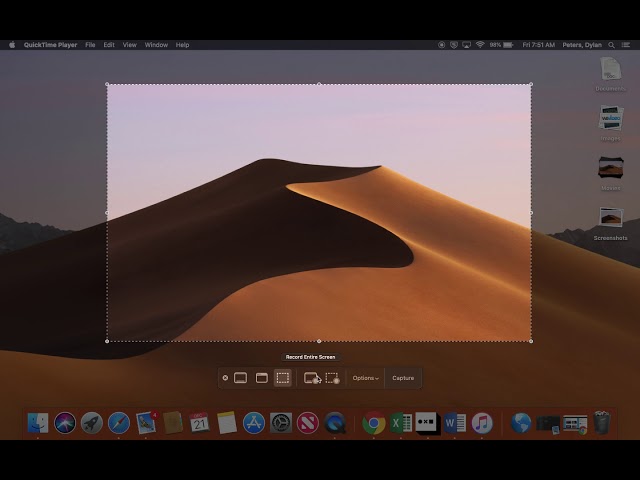
Using the Screenshot Toolbar (Command + Shift + 5)
Press Command + Shift + 5 to open the Screenshot toolbar. You'll see options to record the entire screen or a selected portion. Click Record to start, then click the stop button in the menu bar when you're done.
The recording saves as a
.movfile on your desktop.Limitations: No webcam overlay. No system audio capture without a third-party audio routing tool. No instant sharing. No editing. And the file sits on your desktop until you manually upload it somewhere.
- 2
Using QuickTime Player
Open QuickTime Player and go to File > New Screen Recording. This gives you the same basic functionality as the Screenshot toolbar but in a slightly different interface. The same limitations apply.
- 3
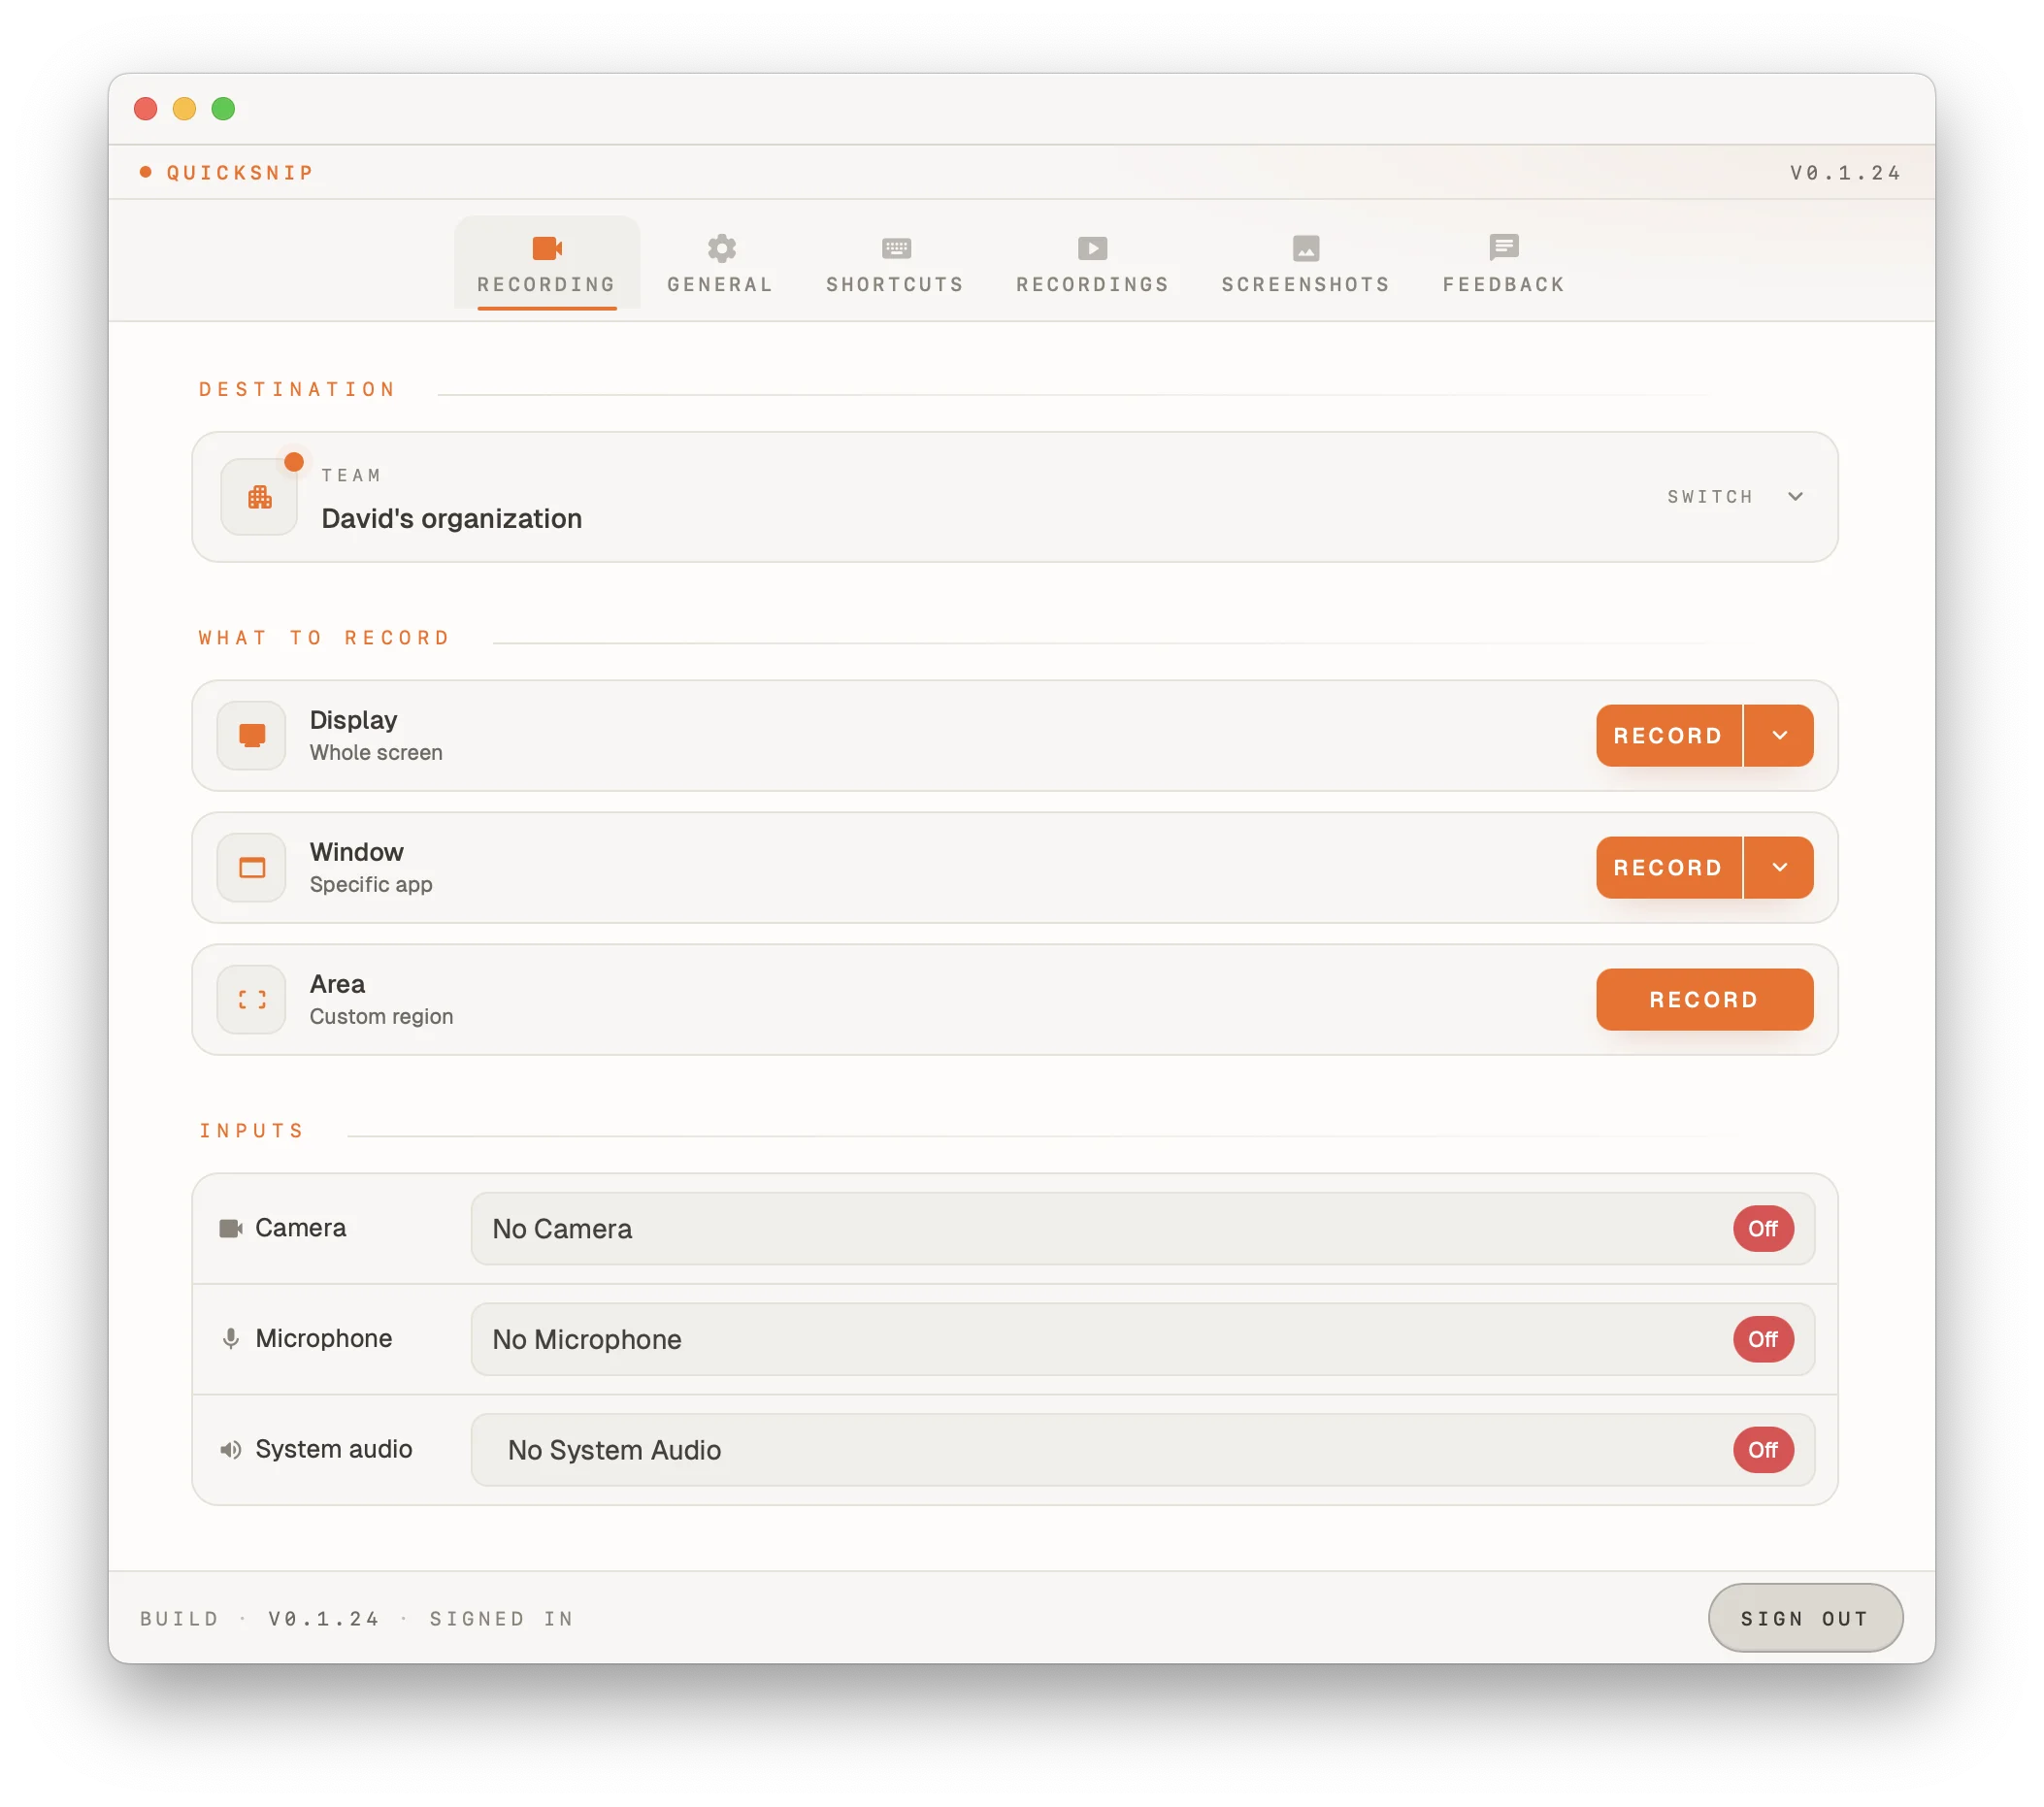
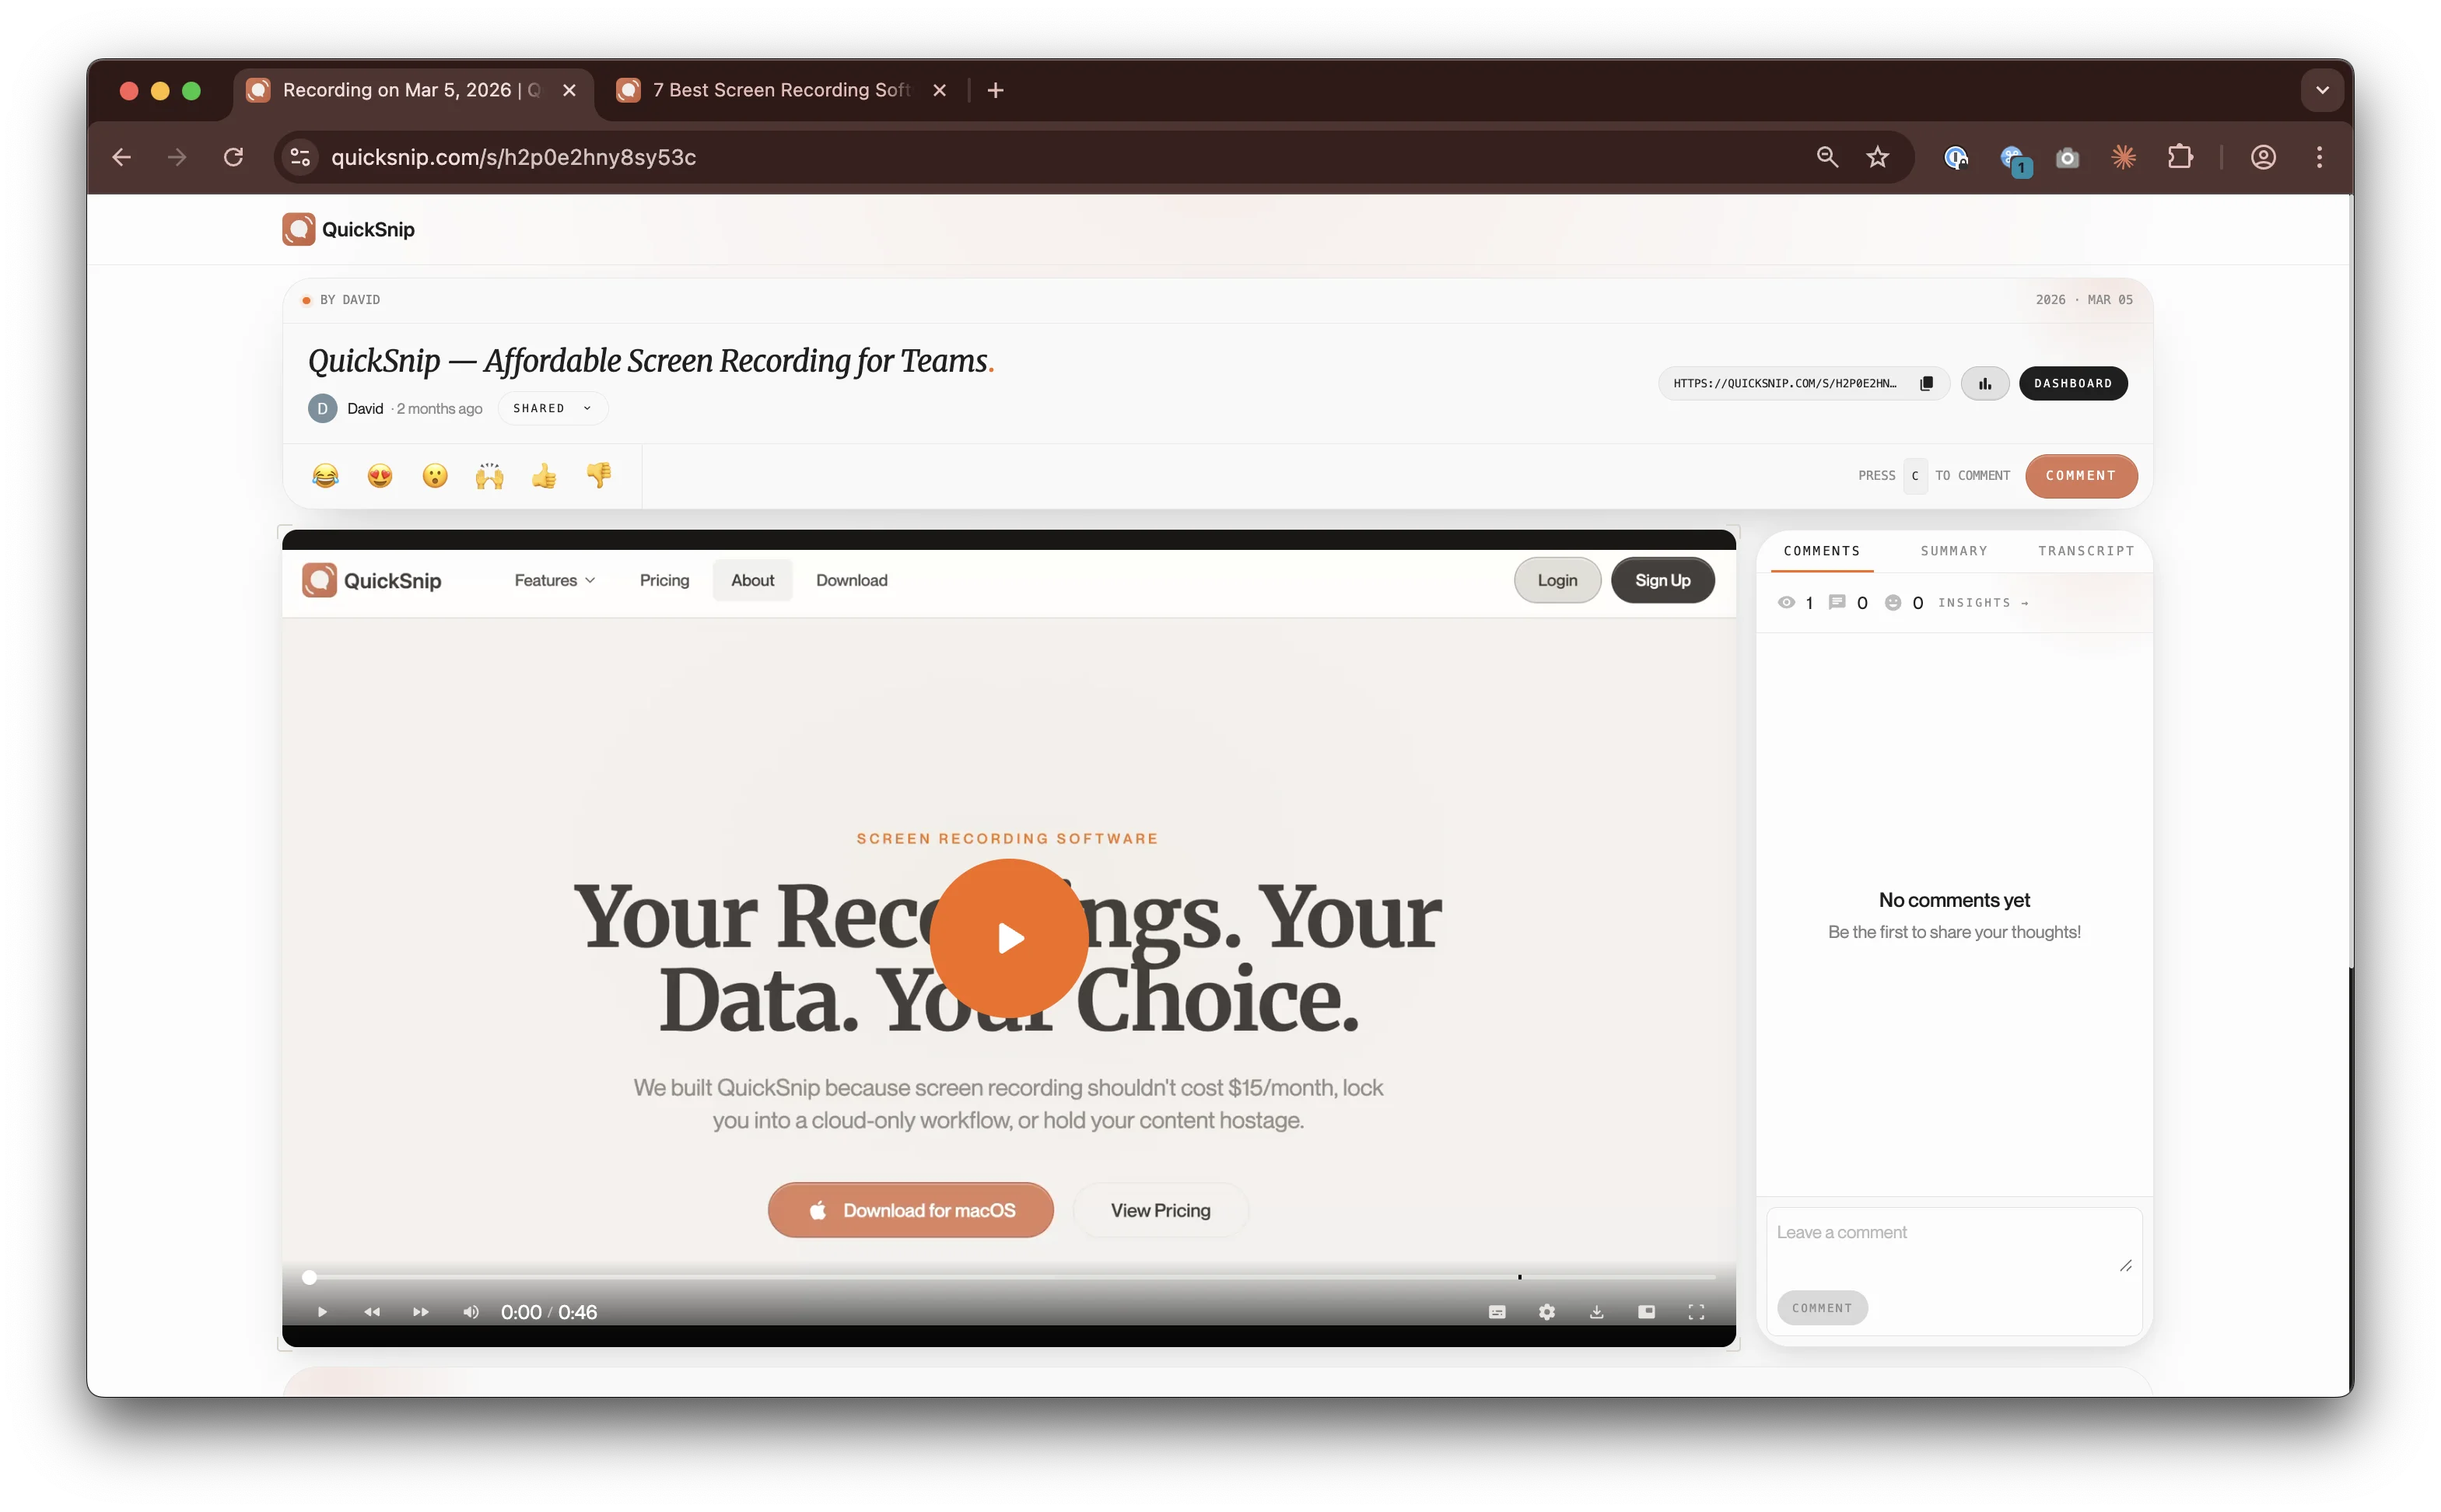
The Better Option: Use a Dedicated Recorder
If you need audio, webcam, sharing, or any kind of editing, the built-in tools will frustrate you. A dedicated screen recorder like QuickSnip handles all of this out of the box. You get 4K recording, microphone and system audio, webcam overlay, and an instant shareable link the moment you stop recording.
Pro tip: If your Mac asks for Screen Recording permissions, go to System Settings > Privacy & Security > Screen Recording and enable access for your recording app. macOS requires this for all third-party recorders.
How to Record Your Screen on Windows
Windows offers a couple of built-in options, both with tradeoffs.
- 1
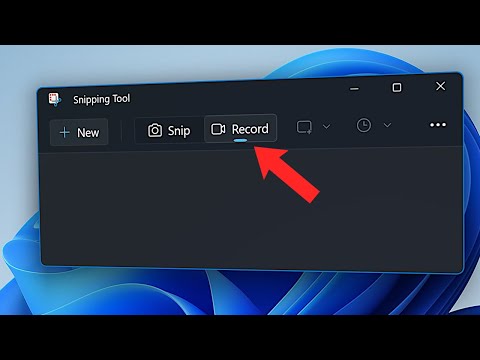
Using the Snipping Tool (Windows 11)
Windows 11's Snipping Tool now supports video recording. Search for "Snipping Tool" in the Start menu, click the video camera icon, draw a rectangle around the area you want to capture, and click Start. A three-second countdown begins, and then your recording is live.
Limitations: No webcam overlay. Limited audio options — system audio support was added in recent Windows 11 updates but may not be available on all configurations. Recordings save locally with no sharing option built in.
- 2
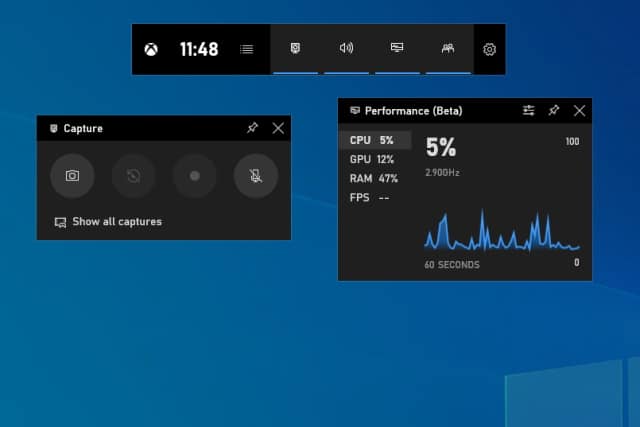
Using Xbox Game Bar (Windows 10 & 11)
Press Windows + G to open the Xbox Game Bar. Click the Record button in the Capture widget, or press Windows + Alt + R to start recording immediately.
Limitations: Only records the active window, not the full desktop. Designed for gaming, so it's clunky for business use. No webcam overlay. No sharing features.
- 3
The Better Option
For anything beyond a quick one-off capture, you'll want a dedicated recorder. QuickSnip works on Windows and gives you full-screen or window capture, audio, webcam overlay, AI-generated captions, and instant link sharing so your recipient can watch immediately.
How to Choose a Screen Recording Tool
Not all screen recorders are created equal. Here's what to look for when picking one.
- 1
Recording Quality
Look for a tool that supports at least 1080p resolution. If you're recording UI walkthroughs or tutorials, 4K recording ensures text stays crisp and readable even on large displays. Anything below 720p will look blurry when viewed fullscreen.
- 2
Audio Capture
You need both microphone audio (your narration) and system audio (sounds from your computer). Many built-in tools only capture one or the other. A good screen recorder captures both simultaneously and lets you adjust levels independently.
- 3
Webcam Overlay
Adding your face builds trust and engagement. A circular webcam overlay in the corner of your recording makes tutorials feel personal and keeps the viewer's attention. Make sure the tool lets you resize and reposition the webcam bubble.
- 4
Sharing and Distribution
This is where tools differ the most. Some recorders save a file to your desktop and leave you to figure out how to share it. Others upload to the cloud and give you a link automatically. Instant sharing is a game-changer because your recipient can start watching before you've even left your desk.
- 5
AI Features
The latest generation of screen recorders includes AI-powered features like automatic transcription, caption generation, and even smart titles and descriptions. AI-generated captions make your recordings accessible and searchable without any manual work.
- 6
Price
Screen recording tools range from free (with limitations) to $300+ per year. For most individuals and small teams, you don't need to spend a fortune. QuickSnip offers a generous free tier and a Pro plan at $6/month that includes everything most users need.
Best Screen Recording Tools in 2026
Here's a quick look at the top tools available right now. For a deeper comparison with detailed reviews, head over to our full best screen recording software roundup.
- 1
QuickSnip
Best for: Quick recordings with instant sharing.
QuickSnip is a desktop app for Mac and Windows that focuses on speed and simplicity. Record your screen in up to 4K, add a webcam overlay, and get a shareable link the moment you stop recording. AI-generated captions are included on paid plans starting at $6/month. See pricing for details, and there's a free plan to get you started.
- 2
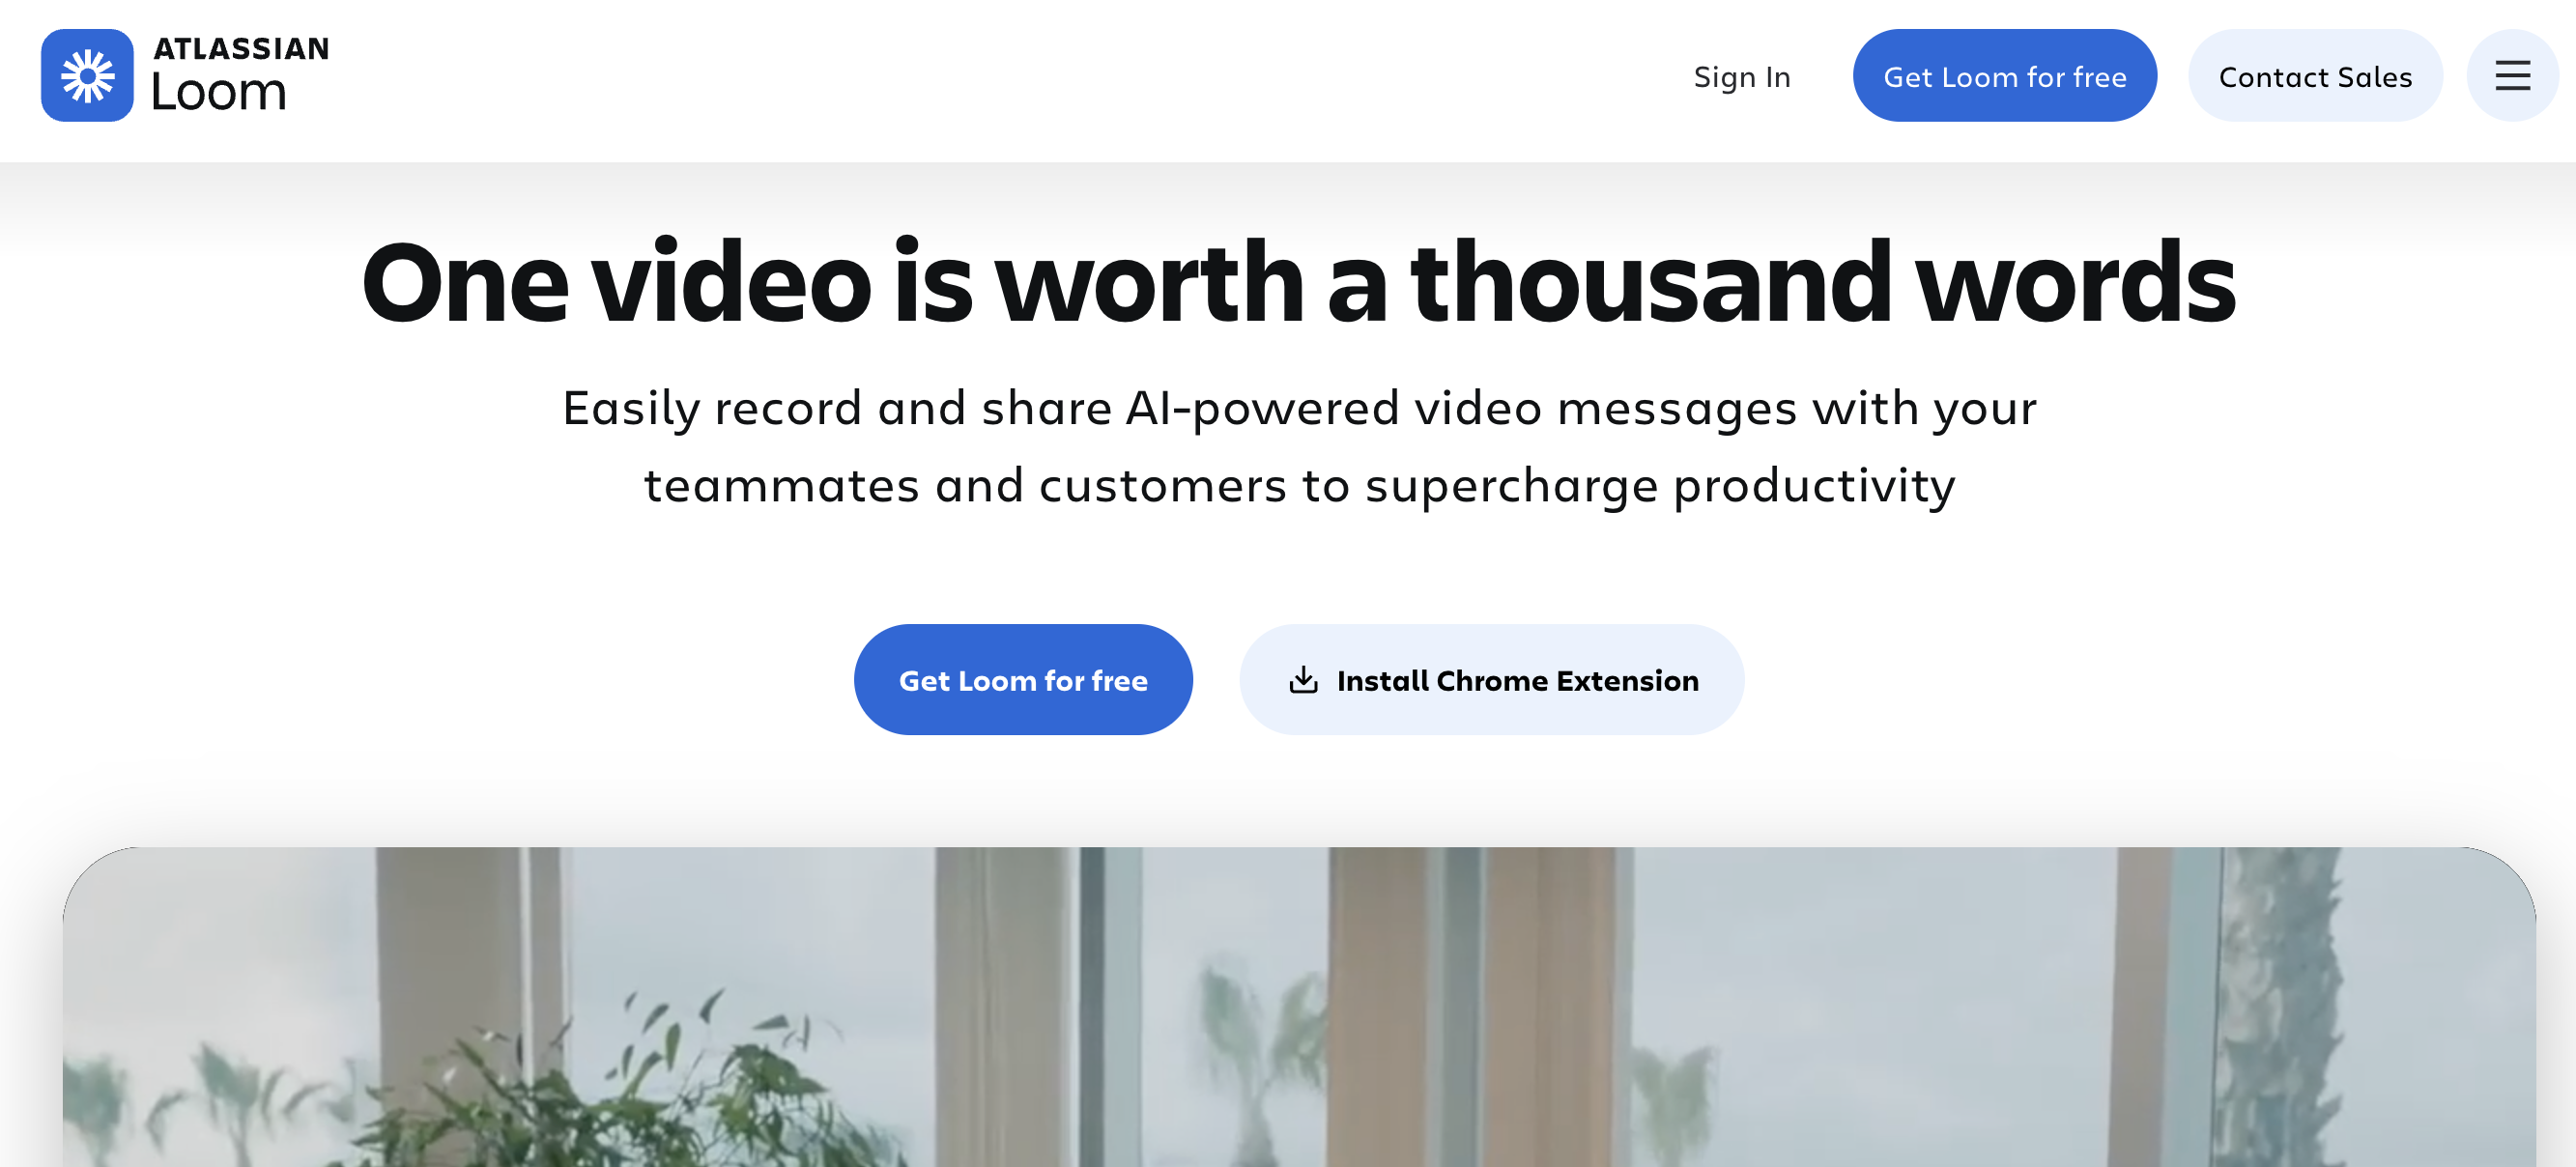
Loom
Best for: Teams already invested in the Loom ecosystem.
Loom popularized async video messaging and has strong collaboration features. The free plan limits you to 25 recordings of up to five minutes each. Paid plans start at $15/month per user. For a detailed breakdown, check out our QuickSnip vs Loom comparison.
- 3
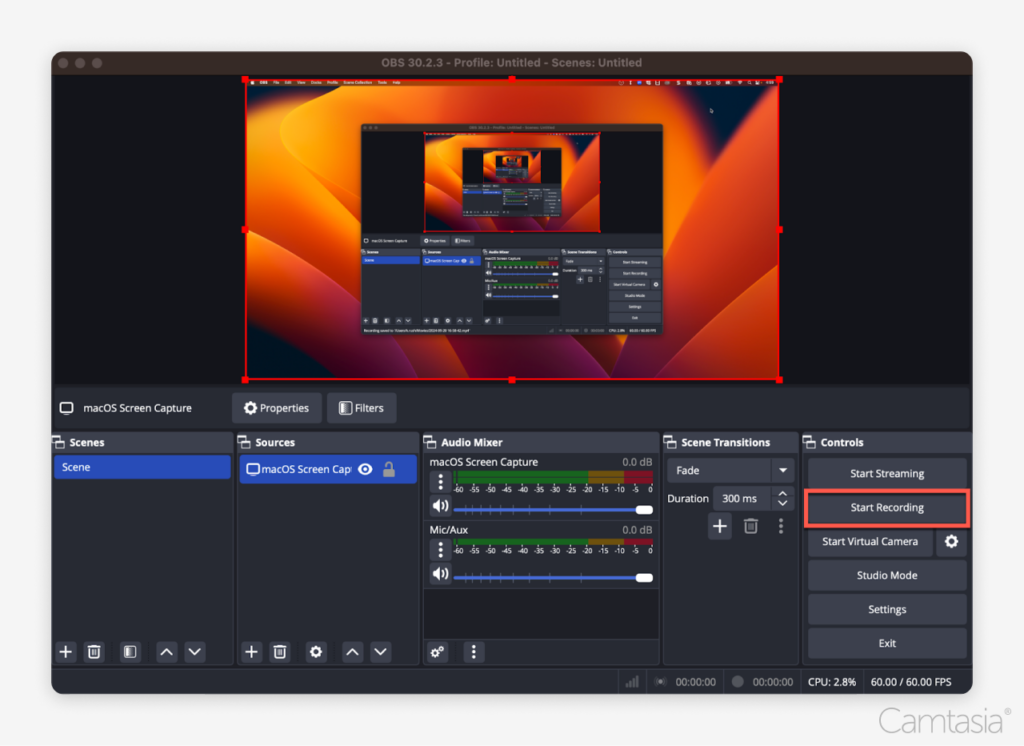
OBS Studio
Best for: Power users who want maximum control.
OBS is free and open source with deep customization options. The learning curve is steep, and there are no built-in sharing or collaboration features. It's best suited for streamers and advanced users who want to configure every detail.
- 4
Camtasia
Best for: Polished, edited tutorial videos.
Camtasia combines a screen recorder with a full video editor. It's powerful but expensive (starting at $180/year) and has a learning curve. Best for users who need heavy post-production editing.
- 5
ScreenPal (formerly Screencast-O-Matic)
Best for: Budget-friendly basic recording.
ScreenPal offers a free tier with a 15-minute recording limit and paid plans starting around $3/month. It covers the basics but lacks AI features on its lower-tier plans, 4K recording, and instant sharing.
For alternatives to specific tools, check out our best Loom alternatives guide.
Screen Recording Tips for Professional Quality
You don't need expensive equipment to create polished screen recordings. These tips make a big difference.
- 1
Clean Your Desktop
Hide desktop icons, close unnecessary tabs, and clear notifications before recording. Viewers notice cluttered screens, and it distracts from your content.
- 2
Use an External Microphone
Your laptop's built-in mic picks up fan noise, keyboard clicks, and room echo. Even a $30 USB microphone dramatically improves audio quality. Bad audio is less tolerable to viewers than lower video resolution.
- 3
Plan Before You Press Record
Spend 60 seconds outlining what you'll cover. A quick mental checklist keeps you on track and reduces the need for editing. You don't need a full script, just a rough sequence of the points you want to hit.
- 4
Record at Your Display's Native Resolution
Don't scale your resolution down before recording. Record at your monitor's native resolution, and let the recording software handle the compression. This preserves clarity, especially for text-heavy content.
- 5
Speak Slowly and Clearly
Screen recordings are often watched at 1.5x or 2x speed. If you speak at a natural pace, viewers who speed up the playback will still understand you. Rush through your narration and it becomes unintelligible at higher speeds.
- 6
Use Keyboard Shortcuts
Learn the keyboard shortcuts for your recording tool. Starting and stopping a recording with a hotkey is faster and smoother than hunting for a button with your mouse. Most tools let you customize these shortcuts.
Common Screen Recording Use Cases
Screen recording isn't just for tutorials. Here are the most popular ways teams use it in 2026.
- 1
Bug Reports and QA
Developers and QA teams use screen recordings to show exactly how to reproduce a bug. A 30-second recording is worth more than a paragraph of text in a bug ticket.
- 2
Employee Onboarding
New hires learn faster when they can watch processes in action. Recording your standard operating procedures creates a reusable library that saves hours of one-on-one training.
- 3
Customer Support
Support teams send screen recordings to walk customers through solutions step by step. This reduces back-and-forth emails and improves resolution times.
- 4
Sales and Product Demos
A personalized screen recording of your product in action converts better than a generic slide deck. Prospects can watch it at their own pace and share it with decision-makers.
- 5
Content Creation
YouTubers, course creators, and educators use screen recording as the backbone of their content. Paired with a webcam overlay and good audio, a screen recording becomes a complete video without expensive production equipment.
- 6
Internal Documentation
Instead of writing long SOPs, record yourself walking through the process. These recordings become living documentation that's easier to follow and faster to create than written guides.
Common Screen Recording Mistakes to Avoid
These are the mistakes that trip up most people when they start screen recording.
- 1
Forgetting to Check Audio
Nothing is worse than finishing a 10-minute recording and realizing your microphone was muted. Always do a five-second test recording before your real session.
- 2
Recording at the Wrong Resolution
Recording at a lower resolution than your display creates blurry text. Recording at an unnecessarily high resolution creates huge files. Match your recording resolution to your display's native resolution for the best balance.
- 3
Not Cleaning Up Notifications
A Slack message popping up mid-recording is distracting at best and embarrassing at worst. Enable Do Not Disturb mode on your computer before recording.
- 4
Making Recordings Too Long
Keep recordings focused. If a topic takes more than five minutes to explain, break it into shorter segments. Viewers are more likely to watch three two-minute recordings than one six-minute recording.
- 5
Skipping Captions
Captions make your recordings accessible to hearing-impaired viewers and useful in sound-off environments like open offices. Tools with AI-generated captions add them automatically so there's no excuse to skip this step.
Start Recording Today
It Pays Dividends Immediately
The Tools Are Better Than Ever
No Barriers to Entry


